Thursday, February 6, 2014

White Asparagus and Ham Double Baked Potato

After a lengthy trip to the grocery store, we returned home with three bags filled with virtue... well, aside from (virtuously) supporting the Calgary Zoo with (not-so-virtuous) limited edition gelato from Fiasco Gelato. (You can read more about this limited edition gelato here.)

Tonight, we'll be salivating over White Asparagus and Ham Double Baked Potatoes. Perfect for dinner tonight and, even better, I'll have leftovers for lunch tomorrow. 

Monday, January 13, 2014

Eating Breakfast

So, it's been ages. No apologies. Just life... and more life... and a wedding... mine... yep. YIKES. A very hectic and festival filled summer at work coupled with wedding planning (and wedding tasks and wedding crafts), I found myself with zero time for the blog. I was still cooking, though not expanding from my usual repertoire as much, but the thought of dealing with photos and writing was enough to push me over the edge. So, I didn't mean to neglect you but I can't apologize for the awesome dose of life that got in the way. Hope that's ok. :)

I'll share more about the wedding later and a great honeymoon in Italy later... Since then, we returned home to find ourselves in the hubbub of Christmas. I had baking to get done and presents to buy, a baby shower to host, a house to decorate, a trip to Edmonton for the holiday, then Lake Louise for more fun. It was a lot. 

After some great exercise (but lots of eating still) in Lake Louise, we rang in the new year and made one of those typical pledges to get out a bit more and make some more great food choices in 2014. We're usually pretty good but the lead-up to the wedding led to more eating out than I am comfortable with and I like how I feel when I'm eating good food that I've made. 

I didn't want to start the year with a list of "resolutions" that would just cause me to cringe in an October reflection... that said, there were a few things that I definitely wanted to improve upon. One of those things was eating breakfast consistently. And, no, I don't mean to stop at Starbucks or McDonald's for a breakfast sandwich that is $3+ more than I need to spend if I took some time to plan ahead and make this a priority.  

It's annoying... I only have myself and the dog to tend to in the morning but somehow between getting myself functioning and ready, walking the dog, then getting out the door, I don't think enough about eating. I sure do manage to brew my coffee though. Priorities. 

So, instead of fighting it, I am making a new plan. 

I love steel cut oats. They have a great texture, are good for you, and manage to keep me going until lunch time... when I take the time to make them. Well, with an already challenging-for-me morning, I certainly wasn't fooling myself into thinking that I would be waking up about 30 minutes earlier so that I would have time to cook said oats. But I could easily make them up the night before.


I've been making a double batch of McCann's Irish Steel Cut Oats, which are my current favourite. Then I portion it out into beautiful Weck jars. A double batch will partially fill eight 500 mL Weck jars, leaving room for whatever you like to season your oats with. I add a bit of brown sugar and cinnamon on top of the warm oats then seal the containers. Once they have cooled a bit, I'll transfer them to the fridge for a quick grab in the morning.


If I have time at home, I can microwave the oats for 60-70 seconds for a quick breakfast. Or I can put the jar into my lunch bag and eat at the office. My current go-to includes bit of cream, cinnamon, and fresh berries. I can't get enough. If 21-days of repetition makes a habit, I am doing well! Plus, there is something infinitely more civilized about a breakfast at your desk when the containers are glass, the spoon is metal, and the napkin is cloth. It's practically luxurious... well, as luxurious as eating at your desk can be. Hey, I'll take it. It's better than the alternative.

Sunday, July 7, 2013

Stampede Midway Food Tour 2013

After a great Capital Ex midway food tour with friends in Edmonton a few years ago, I started my own tradition of a midway food tour at the Stampede since moving here. It's one of those great nights where all dietary rationalizations go out the window and gluttony reigns supreme. If you still have a few bucks in your pocket and don't feel like you're going to fall over, then you need to try whatever culinary delicacy is beckoning you. It's always good to travel in a group for an escapade like this... to a certain extent, there is safety in numbers. When you're getting the tray of deep fried Oreos or the bucket of chocolate dipped bacon, it means that you get one Oreo or one strip of bacon or maybe just a bite of something... it's the only thing saving you from a fast free fall into the food coma. This way, you get to "enjoy" a bit more before your need for water and rest overwhelms you and puts a stop to the fun.

The Stampede, like so many other exhibitions now, features the newest and craziest additions to the midway food fare as part of the overall attraction to visit. You can see the new food features here and maybe add something to your midway hit list. (Though, after reviewing it again, it doesn't look like we tasted any of these! That said, there was plenty of indulgence and ridiculousness in our tour.)


The other part of this was that we really wanted to get out and support the Stampede after the recent and very devastating floods in Southern Alberta. The Stampede was hit hard by the floods, donning the slogan "Hell or High Water" in response to their recovery efforts, and the City rallied. The Friday night of Stampede was certainly testing the resilience of attendees as it again doused the grounds, even hailing at points. We certainly stayed and showed our support... come hell or any water.


Now to the food!

Friday, July 5, 2013

wannaGROW: Chives (and Cheddar and Chive Focaccia)

It's a bit amusing to have a wannaGROW on the topic of chives, as most people have such voracious chive plants that they don't want them to grow! I've lucked out with, yet another, discovery in our garden... a lovely and small and reasonable little chive bush.


I read on one garden website that "chives do not thrive on neglect," which I laughed at because I really haven't given my chives much TLC. Partially because I don't want them to spread like crazy but partially because I am still figuring out what I need to do with all of these plants in my garden. 

CHIVES TIPS
I've learned that you should harvest the chives by cutting them about two inches above the soil, using scissors, to encourage regrowth. So, unlike the rhubarb where you should absolutely NOT cut, here it is okay to cut. Harvest from the outside edges to the inside. Remove the flowers, as they appear, to keep the plant vegetative and producing.

Monday, July 1, 2013

wannaGROW: Chive Blossoms (and Butter and Vinegar)

I just had a good laugh... at myself. wannaGROW isn't as much about what I can grow as it is about what I can't kill. Rhubarb and chives. What a good starting point!

So, at a certain point, likely around mid-June here, your chives will begin to flower. Those pretty little chive blossoms, with their delicate purple petals, are as edible as the plants that spawned them. 


CHIVES TIPS
I've learned that you should harvest the chives by cutting them about two inches above the soil, using scissors, to encourage regrowth. So, unlike the rhubarb where you should absolutely NOT cut, here it is okay to cut. Harvest from the outside edges to the inside. No additional care is required to get from plant to blossoms... it's just part of the life cycle each year.

Now, you can sprinkle the chive blossoms into salads, use them as a beautiful edible garnish, or... you could try something different. Maybe mix some beautiful chive blossoms into creamy white chevre for unique addition to your cheese plate. Or... you could make chive blossom compound butter or a chive blossom infused vinegar!

CHIVE BLOSSOM BUTTER
If you're feeling ambitious, you could make a batch of fresh butter for this little culinary escapade.


Let butter soften and come to room temperature. Add the petals of the chive blossoms to the butter and combine.


CHIVE BLOSSOM VINEGAR
Ingredients:
2 cups chive blossoms
~4 cups white vinegar (you can always sub in other vinegars here... maybe a champagne vinegar?)


Give your chive blossoms a quick rinse to get rid of any debris or bugs. Put your blossoms in your glass jar, then top with vinegar. Let marinate and infuse for two weeks in a cool, dark place.


Strain vinegar through a fine mesh sieve to remove the blossoms, then decant into a jar or bottle. Now dress your homegrown greens with a beautiful olive oil and your homemade chive blossom vinegar!

Tuesday, June 25, 2013

wannaGROW: Rhubarb (and Honeyed Cardamom Rhubarb Compote)

Life with a monster garden means a monster amount of work. It means loads of weeding, digging, pruning, planting, composting, and so on. In the past three years, we've brought our yard from an overgrown disaster to a more intentionally overgrown disaster. hah! We've pulled out some things, figured out what needs to stay, read books, and learned from Mom. We're trying to turn our not-completely-black thumbs into green ones. It's a work in progress. But that seems to be the underlying lesson that I hear from most gardeners... you learn by doing.

So, we're doing and we're doing our best.


One thing that seems to require very little effort in our garden is this lovely little patch of rhubarb in the back corner. The first year, we didn't even know it was there. The second year, we discovered it and that was about it. This third year, we managed to get there early, weed around it (courtesy of Des's elbow grease and contributions) and found ourselves harvesting a great amount of rhubarb!

RHUBARB TIPS
There are amazing tips on working with rhubarb on Canadian Gardening's site. What I did learn about harvesting was that you DO NOT cut the stalks to harvest them. Rather, you should grasp the stalk at the base, pull gently, and twist. Apparently this will encourage the root to continue to produce, as opposed to cutting which discourages it altogether. I think that little leafy bit (hidden by the big stalk that you just removed) is the whole reason for the harvesting technique. That little leaf will become a big rhubarb leaf and stalk soon enough!


Also, remove the flower stalks as they appear. If you leave these, the plant will put its energy into developing the flowers and become dormant for the season, as opposed to continuing to produce edible stalks for you. Oh, and a BIG no to eating the leaves. This is not the time to add variety to your garden salad. The leaves are toxic but they can be composted safely or turned into a helpful pesticide for your flowers like the one here. Just don't spray it on anything that you'll eat later. The leaves remain toxic even in this form.

I remember rhubarb in many forms when I was a kid. We grew up eating rhubarb fresh from the ground... a stalk rinsed under the garden hose with a tiny container of sugar. I remember my Dad making stewed rhubarb and eating it on anything... ice cream, toast, or just a straight bowlful of it. He loved it. Here's an idea for something slightly different for your rhubarb harvest...

Sunday, March 17, 2013

Chocolate Espresso Banana Bread

I've been spending a LOT of time lately revisiting my eating and cooking habits. I don't like "light" or "diet" or "non-fat." (Though I do like 1% milk for my cereal.) For me, I think having a small pat of butter is more important than having a mass of a fat-free version. But somewhere along the way, I think I lost sight of portion sizes or maybe it was just a combination of factors. Regardless of the progression, I didn't like that a few favourite pieces of clothing were a bit too snug...

Time to revisit.


So, I've been trying to choose more vegetables than starches... opting for greek yogurts versus mayonnaises... and trying to get a bit more creative. I still enjoy the french fries and gravy every so often but it just can't be every day.

Time to be (a wee bit) healthier. These mini muffins are a great step in that direction... Wheat bran and flax kick up the fibre and omegas, bananas are full of potassium, greek yogurt is a great source of calcium and protein, agave is much sweeter than sugar so I could use less to achieve a similar level of sweetness as using brown sugar. And let's not forget my favourite sweetie-treatie justification... dark chocolate is a source of happy healthful antioxidants. So, I'm feeling pretty good about my little creation here. haha.

Sunday, January 27, 2013

Eats & Smiles: Reflections on 2012

It's interesting how quickly things can change in one's world. Times like these seem to leave you less energy or inspiration for other things... like cooking.

It's been a whirlwind.

My December was filled many casual drinks with old friends and a few with some new ones. I managed to have some quality time with friendly and family faces. My world became bigger and smaller in the span of thirty days. The two biggest bits of news... We got engaged! In a completely amusing moment of shock and surprise, I found myself saying "of course" to a pledge of becoming a Mrs. Then, our world became a little bit smaller as our New Year's Day found us in the emergency vet and saying goodbye to our dearest and first furbaby, Wally.


Ironically, I had started the month of December with writing a love letter to the Edmonton Humane Society, thanking them for bringing both Wally and Jack into our lives. It was published this last week...

Tears of joy.

And tears of sorrow.

So, yes, it's been a whirlwind. To put it mildly.

In a wannafoodie world, I definitely chipped away at some of my foodie goals for 2012, which included:
- Mastering the creme brulee
- Making bread and -shocking- making cheese
- More brunch with friends
- Curing and preserving
- More Mexican
- More Soul
- More ice cream
- French cooking
- Infusing
- Donuts

Well, I definitely made some fantastic attempts in some areas and didn't chip away at others. I made a few creme brulees and pot de cremes... some turned out more like runny custard toppings or chocolate fondues. They were all still tasty!

I made many many loaves of sourdough bread and other sweet breads a la Peter Reinhardt. My momma launched her bread company and proved that she is truly a bread master. The "bread touch" is in my genes... somewhere! I'll tap into that even more and figure out if I can master these doughs.

It's so funny to read about making cheesemaking a goal for 2012! When I wrote that, I had absolutely zero idea that Valerie, Ian, Addie, and Deb would be launching Cheesepalooza that August. By August, I had made a few fresh cheeses but the challenge gave me such a framework of both learning but also of support that made this 2012 challenge much more attainable than it may have been on my own.

There were many more brunches with friends but also dinners with friends, drinks with friends, camping with friends, and so on. Food is so much better when you get to enjoy it with others. We even challenged ourselves and made a multi-course meal for New Year's Eve, where we made the meal together, then sat and enjoyed the meal together, complete with some pretty decadent wine pairings for each course. It was infinitely more comfortable, casual, and celebratory than being in a restaurant... having to dress up, pay through the nose, worry about finishing up by a certain time, and -the worst- figuring out how to get home on that very busy evening!

There was no curing, as I had no idea how all-consuming my cheese challenge would become, but there was more preserving this year. We have come to completely hoard our stash of preserves, carefully selecting jars for consumption, and enjoying the fruits of our labours and the bests of the season previous.

There was a bit more Mexican (and an amusing attempt at a campside mole) but no more attempts at Soul. Still some work to do in this area.

There were a few more ice creams and sorbets. I was particularly pleased with a pumpkin pie-chevre faux ice cream. It was little more than pumpkin puree with homemade chevre, pumpkin spiced syrup, and a bit of gelatin (after finding inspiration from my Momofuku cookbook in the use of gelatin).

I succeeded in adding more French cookery to my repertoire! I made dulce de leche filled puffs in Argentina of all places for Brunch with Friends 3... a little Europe meets South America. I read French Kids Eat Everything, which pushed me to think about my own eating habits both in terms of the what but also the when and how. It reminded me that it never hurts to add a bit more ceremony to your daily meals. I took a French Country cooking class, which was fantastic! Then we remade that menu with our own inspiration for a family dinner. I read Julia Child's and Laura Calder's cookbooks... reminding myself to cook ingredients simply and preserve their integrity through elevation and simple sophistication.

I didn't manage to attack any infusions but sure did enjoy some mixology attempts... I now know that my perfect negroni substitutes cinzano for the red vermouth. I will also substitute aperol for campari, if I am feeling like toning down the delightful bitterness.

Oh donuts... donuts... I sure managed to eat them but did not manage to make any. I sure need to get on that bandwagon.

So, all in all, it looks as though I managed to chip away at some of my foodie goals better than others but am so happy with my progress. I definitely feel as though I have a broader repertoire than when I started. I'll continue to work towards achieving more of these goals.

And eating a lot more salads... I do have a wedding coming up now.

Tuesday, December 11, 2012

wannafoodie in Metro Edmonton!

I'm thrilled to be included, alongside the esteemed and amazing Kitchen Magpie Karlynn and Phil the Baconhound, in a 12 Days of Christmas feature in Metro Edmonton. The 4th day of Christmas featured favourite holiday recipes from the three of us as well as many other local Edmontonians. 

Check out the full article and recipes here!


You can also find the full, step-by-step version of the Peppermint Hot Chocolate Cookies here. These are fussy babies since homemade marshmallows do not withstand heat in the same way that store-bought marshmallows do... so you have to chill chill chill your dough (and even your assembled cookies), cook these at a low temperature, and I highly recommend a test cookie to make sure that your oven isn't too hot! (Or... maybe give these a shot with store-bought marshmallows with a slight drop of peppermint extract on it.)


Thanks again to Metro Edmonton and Heather for including me in this Christmas countdown! And to all of you for reading!

*smiles*

Thursday, November 29, 2012

Cheesepalooza: Mozzarella

In this month's mozzarella challenge, I was pulled into several different directions. I had made a quick mozzarella at this year's Eat Alberta conference and thought it was just a fantastic, quick little food trick to have in my repertoire. I thought the same might be said about the traditional or junket mozzarella recipes, as described in Mary Karlin's book. While not exactly quick and easy cheeses to pull out without planning, I was really excited to jump into this Intermediate Cheesemaking section and continue to build my skills. So, rolling up my sleeves, I thought it might be *fun* to make the traditional, junket, and quick mozzarellas all in one month and compare the results.

While I was excited, I was also quite nervous about this next step. Cheesemaking was about to get a whole lot more complicated... and will get a whole lot more complicated in the new year. The challenge of mozzarella was going to teach us about stretched curd cheeses. It's about learning to create the right amount of elasticity, stretch, and texture in the cheese.

Friday, November 23, 2012

Chicken and Waffles

I'm not a big fan of leftovers. I can manage eating a copy of a meal once before I need to really repurpose it or risk it going sideways in the fridge while I avoid it. To minimize this, I seem to try cooking less or inviting guests to reduce the potential amount of leftovers that I need to deal with. This time, however, I felt particularly inspired and wanted to reinvent the leftovers into a dish of its own merit and tastiness.


Enter, chicken and waffles, leftovers extraordinaire from a spectacular roasted chicken and cheese souffle dinner. I have had a few incarnations of fried chicken and waffles in restaurants. Definitely tasty. Definitely a biiiiiiig meal. Barring the fried chicken, why couldn't I make a roasted chicken and waffles dinner? (Or, for those of you facing pounds of leftover turkey, make roasted turkey and waffles??) Cheesy, herbacious waffles... warm fragrant chicken... smothered in gravy... dabbed with maple syrup. What's not to like??

Roasted Chicken with Cheese Souffle

I started my day with a few welcome lattes and laziness before moving on to attempt cultured butter for Cheesepalooza (which I will write about another day). Of course, though, I wasn't entirely focussed on the cheese between making my next latte and reading my book... and what happens?? I scald the cream. It was well well well beyond the required temperature for the butter. Instead of waiting for it to cool down (and even chancing that it could work after being burned like that), I stopped. What does one do with a pot full of scalded cream? Well, make creme brulee, of course! (Yeah, I can see your eyes rolling at that "of course." haha)

So, then I decide to give Julia Child's creme brulee recipe another try... I don't always have success with it setting up without a requisite water-bath but I continue to try. If it doesn't set, brulee it anyway! It's still a success, it's just not creme brulee... it's creme anglaise bruleed! (Whip the eggs, add the sugar, temper the eggs, then incorporate the required cream. Ladle into ramekins, then set in the fridge to cool.)

Now I have six little creme brulees cooling. What is the next logical step? Well, the next logical step would be to invite people for dinner, right? I certainly cannot eat (or rather allow myself to eat) six creme brulees on my own, so I need to invite people to join in the eating.


There was still a bit of scalded cream left, so it seemed only reasonable to melt chocolate into it, add two egg yolk, add a splash of cointreau, then ladle into little ramekins as well for little pot au cremes. Yep. 

Well, the byproduct of making creme brulee other than using up that scalded cream is that now I have a bowl full of egg whites. Six to be exact. What to do when faced with egg whites and a dinner party? Time to make souffle!

To recap, I went from cultured butter to scalded cream to creme brulees to dinner party to pot au creme to souffle. Even my eyes are rolling now...


Roasted Chicken with Thyme, Sage, Parsley and Rosemary
Aged Cheddar Souffle
Green Beans with Butter and Smoked Salt
Mixed Greens with Cherry Tomatoes and Homemade Feta
Creme Brulee and Chocolate Pots with Berries

Tuesday, November 13, 2012

Cheesepalooza: Crescenza

I know that there is much more to the world of cooking (and eating) than cheese. Despite the recent overwhelmingly cheesy content of my blog, I really do know this. But what you don't know is that making cheese is so completely and amazingly addictive that I can hardly stand it. 

I'd say that I would be a few cheese-ploits away from requiring an intervention. In the midst of this cheese-making, I actually woke in the middle of the night and decided to capitalize on that moment by flipping my cheese before returning to bed. Then, I brought my cheese to work, so that I could take it out of the brine on time. Yes, that is crazy. Trust me, even I thought so. But every time I have a new cheese in the cave or fridge and get to present it proudly to my friends and family... I can't help but think of what I can make next. 


In this instance, I was making crescenza, an Italian cow's milk cheese that is very soft and creamy without any real rind. It's another one of these cheeses that requires little time from start to consumption, which is always nice.

Tuesday, November 6, 2012

Emma's Elmo Birthday!

What is about to follow is absolutely shameless posting of an adorable little gal... our little Emma-bean, niece-extraordinaire, who is growing up to be a wonderful little person because of her great parents (Alan and Kate) and the village that they have supporting them. 

H A P P Y   B I R T H D A Y,   E M M A! !

Momma Kate has the market cornered in terms of family birthday cakes and prepares a special creation for the birthday celebrations in the family. This time, for Emma's birthday, she invited me over to help create the oh-so-loved Elmo birthday cake and Cookie Monster cupcakes for Emma's 2nd birthday.

Tuesday, October 30, 2012

Roasted Chicken with Maple Butternut Squash Risotto

Two of my absolute favourite things to cook are the jumping off point for this fantastic Sunday (or any other night) dinner... roast chicken and risotto. I see both as blank canvases where you can add seasonal flavours or elements to make a crowd-pleasing meal at any point during the year. A roast chicken and risotto in spring might feature loads of lemon, mint, and young new green peas. A roast chicken and risotto in the winter might feature root vegetables from the cold room, rosemary, and lots of red wine. 

On the cusp of a short fall and a clawing winter, I felt like this sort of comforting, transformative meal was exactly what our household needed after a long overdue weekend of relaxation and home time.

We visited our favourite Bridgeland Market on the weekend to gather some ingredients and also get our pumpkin for the annual market pumpkin giveaway... the jumping off point for the meal came as I walked down one of the aisles and spotted a can of Farmer's Market organic butternut squash (check out their products and the great recipes on their website.. I have bookmarked a few already). It seemed like the perfect starting place for this meal.

Roasted Chicken with Garlic and Herbes de Provence
Maple Butternut Squash Risotto
Maple Gravy

Monday, October 29, 2012

Cheesepalooza: Feta

Feta, feta, bo-beta.. banana fana pho feta.. fe fi fo... FETA. Yep, that was dorky. I couldn't resist. Or, more so, I couldn't get it out of my head... I'm sorry.

When our October challenge was issued, I had trouble deciding whether I would make the feta or the halloumi. Time was quite limited in October, so I knew that I wouldn't be able to make both in this month, though I had every intention of making the other cheese at some point down the line. 


I ended up choosing the feta. I had been having so much success and enjoying the low-and-slow goat cheeses and, thus, wanted to continue on with that roll. Plus, feta is one of those cheeses that I would buy but never considered making (obviously, until this challenge was issued). The aggressive salt, interesting texture, and sharp brine... it just seemed like too much to mess with at home. And, just like the chevre and cabecou and many other cheeses that I have been enjoying making, it really wasn't worth stressing over. I could manage it.

Tuesday, October 9, 2012

Cheesepalooza: Cabecou... maybe?

After so many pretty pictures of cabecou or "little goat" turned up on blogs and the Cheesepalooza facebook page, I had to try my hand at it. Take one look and I think you'll agree!


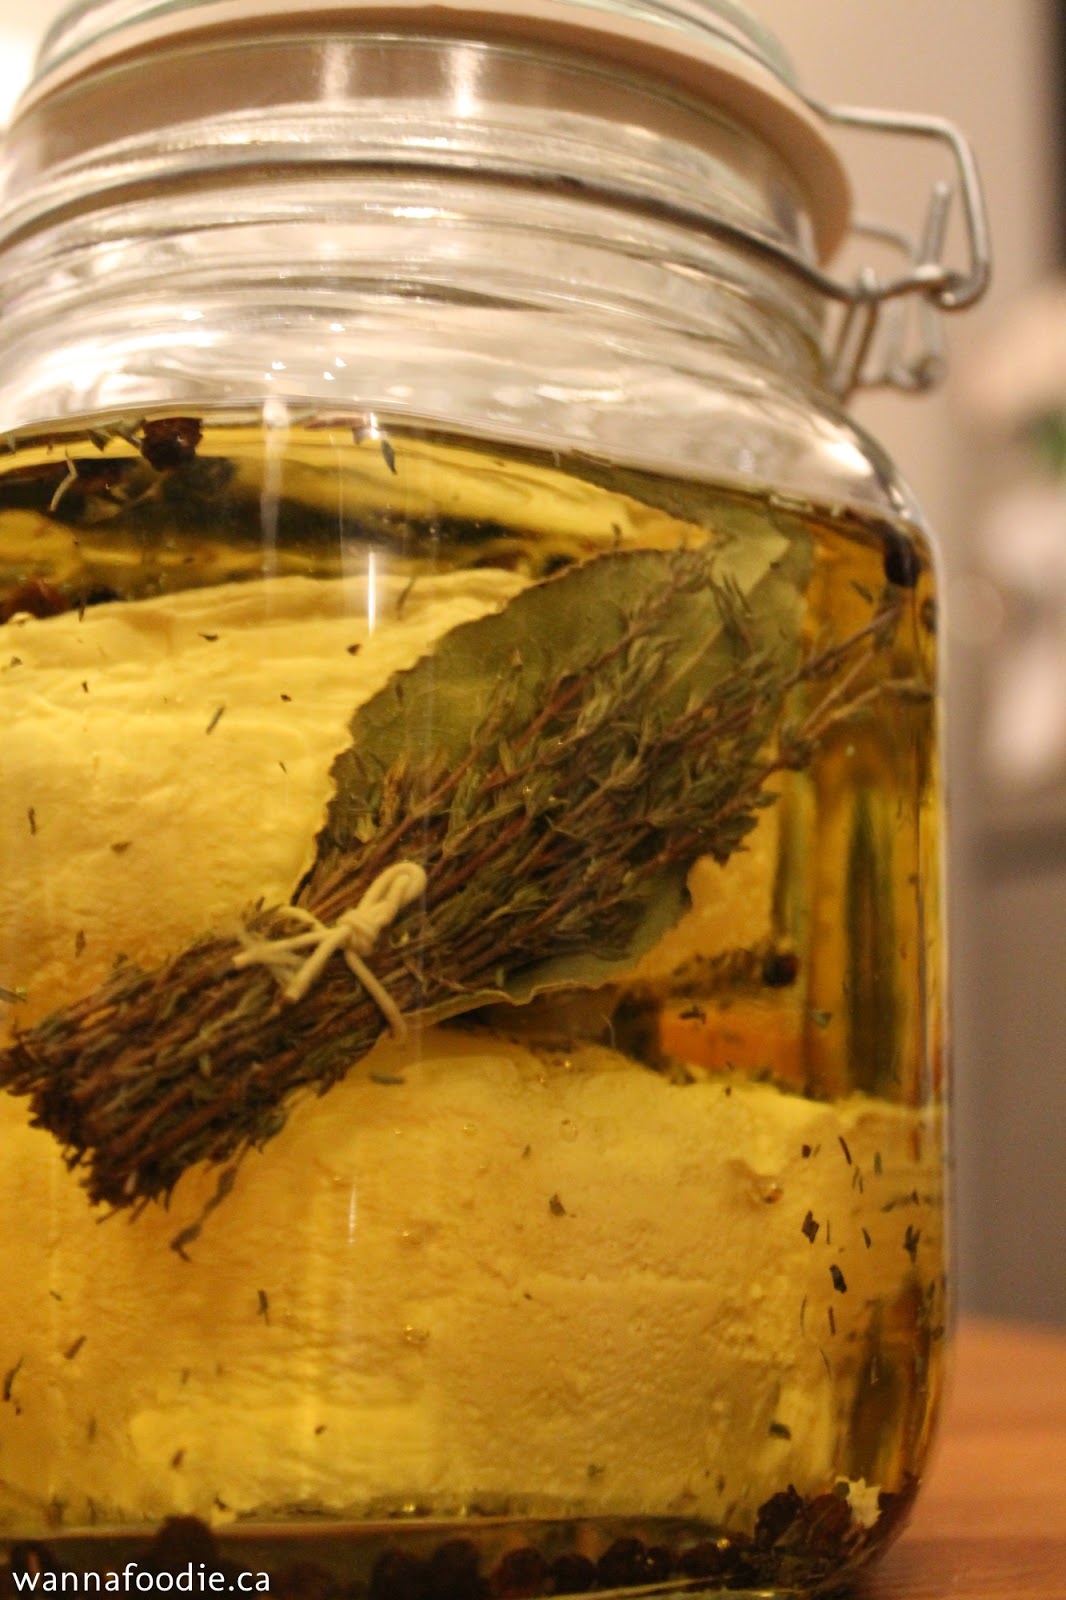
Cabecou is a classic French goat cheese that is formed into little rounds then aged or ripened for 10 to 15 days, according to our guide. It can be ripened into a soft spreadable cheese or left longer to reach a texture and firmness that you are able to grate. The one that caught my eye the most was the marinated version, which yielded both a supple and flavourful cheese as well as a fragrant oil that could be used for dipping or finishing. Though, after the success and rave reviews of the ricotta salata, I think I'm going to make not only the marinated version but also the dry salted versions again very soon.

Monday, October 8, 2012

Cheesepalooza: Ricotta Salata

Oh, ricotta salata... this is a cheese within a cheese. First, you need to make yourself some ricotta. You could opt for the whole milk ricotta or, as I did, you can build on flavour by utilizing whey ricotta. Then you salt and cure the ricotta to create a whole new cheese experience.

I made my whey ricotta using goat's whey and cow's milk, which made for a more complex yet still mild flavour profile. Since most commented that the ricotta salata was a fairly mild and innocuous cheese, I thought I would give it a bit more umph by using my combo whey ricotta.


So, once you've made your ricotta (in whatever form), you need to press it into a cheese mould, then salt it over the course of a week, then age it until it has reached whatever your ideal texture or density is, then eat it!

Cheesepalooza: DIY Cheese Moulds

Don't get me wrong, I love to throw myself into a project. I like to have all of the fancy supplies and gadgets. I try to not cut corners... mostly. :P I want to make an earnest effort and work hard to achieve the best result possible. All of that said, I had spent a few pennies purchasing the rennets and cultures and cloths required for the Cheesepalooza project but wasn't quite ready to purchase cheese moulds. Storage is at a premium in my small kitchen and I also wanted to be sure that, when I did purchase moulds, they would be moulds for cheeses that I would make again and again and again. Why buy a mould for a cheese that I didn't end up making or maybe didn't end up even liking?

So, I decided to DIY. Ian at Much Ado About Cheese has DIYed many of his cheesemaking supplies, so have Valerie, Addie, and Deb. I am reasonably handy... I can change light bulbs, assemble some Ikea furniture, and own a power drill. Ok, I'm not that handy and certainly a far cry from being a DIY Network star but I can get by. It was worth a few bucks and an attempt anyway...

I went off to the dollar store and found myself a few plastic BPA-free, food safe containers that I thought could function as reasonable moulds for my cheeses.

Cheesepalooza: Whey Ricotta

In making all of these cheeses, I have been left with an exorbitant amount of whey. Charlie the puppy absolutely loves this, as a bit of this on his kibble like cereal is enough to have him doing flips. The plants have loved it... though that season is coming to a close. I'm using it in bread. I can't quite get around to drinking it... just a mental block, I think. Maybe if I blend it into a smoothie?


One thing that I had to try in using up this whey was to make a whey ricotta. I thought I'd mix it up a little bit and make a whey ricotta using goat's milk whey and whole cow's milk.

I couldn't quite get the double-boiler bit coordinated... it's tough to find a pot big enough to fit a pot that fits two gallons of liquid! Instead, I opted for the single pot but warmed it extra slowly to compensate (it was more than 45 minutes to get to temperature).

The whole process was quite simple - heat, curdle, drain, cheese!

(It probably could have drained a weeeeee bit longer based on this photo...
but it was still soooooo good.)
Related Posts with Thumbnails